Problem: The way the nodes come in can be somewhat disorganized, and/or geo is placed under a lot of transforms.
Solution: You can manually clean up individual nodes. No solution is required for objects meant to remain static.
Problem: For Characters, the Morph Targets need to be controlled separately than the face.
Solution: The morph targets are still brought in successively but will need to be controlled separately. Instructions for Manual control can be found below. Please note, this fix will take some time, as it needs to be done with every morph target.
Example: If you want to control the morph targets on the character, like the face, the eyelashes don’t move. There are sliders for both - so if you want to make a character smile, you can do that, but the eyelashes will be controlled via a separate slider.
How to connect them: Manual Fix for the Morph Targets
1. Open Up Shape Editor a. Windows > Animation Editor > Shape Editor
2. Select both blends, right click and Select Blend Shape Nodes
3. Open up Node Editor a. Windows > Node Editor
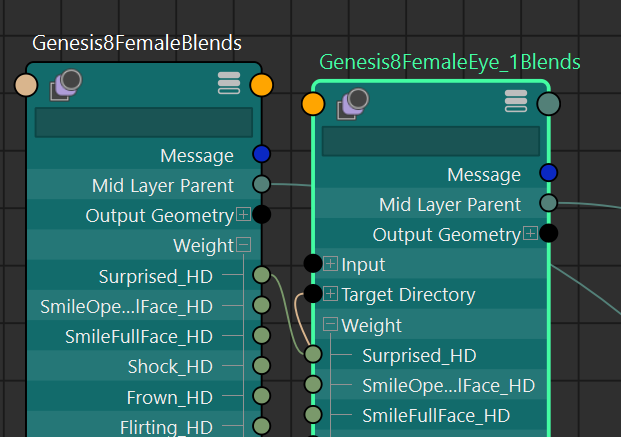
4. Click the Double Arrow box to show the nodes. 
5. Click the Bars on the node to show more details. ![]()
6. Open Up weights in the nodes for the blends and Parent the node that you wish to use as the main to the child.
Problem: Some object locations will not be the same as they are in Daz Studio.
Solution: This problem only occurs for a select few Daz Assets that are transferred via the Bridge. If certain Props and Environments are transferred with the joints still existing, it can cause the locations of the objects to be wrong. This can be fixed manually if needed.
Problem: Select Textures from Genesis 8 will not transfer automatically.
Solution: This is only a problem for a few textures, and can be manually fixed.
Example: With Victoria 8, all textures are expected to be in one location, but the eyelashes are separate from the Genesis 8 model. The script doesn't know the eyelash textures are specific to Genesis 8 and the user has to pull them in separately.
Problem: Why when I am converting assets to Arnold the transparency is not working? When does this happen? This will happen if the object is transparent (eg. made of glass) or if a Character is using hair cards.
Solution:
- Object is Transparent:
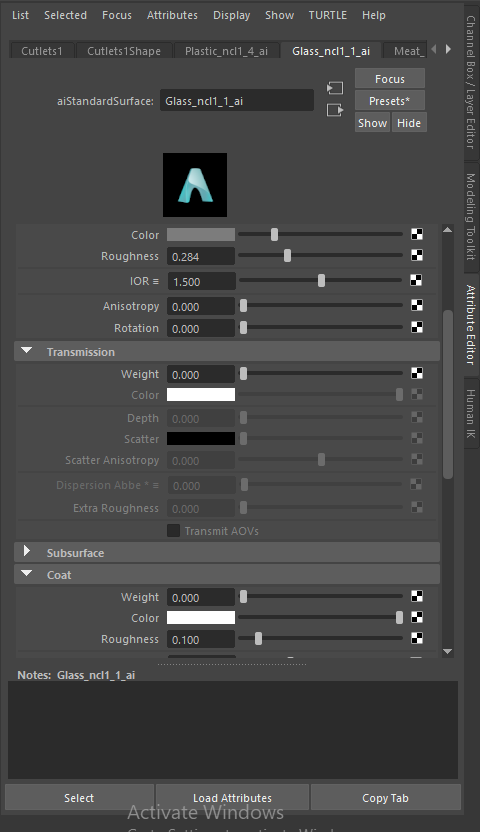
- Select the object which should be transparent.
- Open up the attribute editor and select the material.
- Scroll down to Transmission and adjust the weight to your liking.
- Character using hair cards.
- Select the hair
- Open up the attribute editor and select first the material.
- Scroll down to Geometry and under Opacity click the Checker box.
- Select file and the window will pop up. Click the folder icon and select the opacity/transparency map for the hair.
- Do the steps again for however amount of materials are missing the opacity/transparency map.
Object is Transparent
Character Using Hair Cards
