
The instructions below have been separated to list each process within Daz Studio.
Character into Daz Studio:
Step 1: Select the “Smart Content” tab located on the left side of the interface.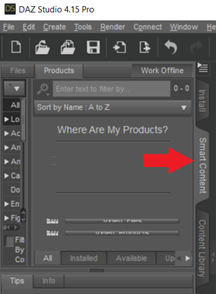
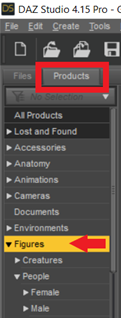
Step 2: Select “Figures” from the listed menu under “Products.” All of your free or purchased products will be listed here.
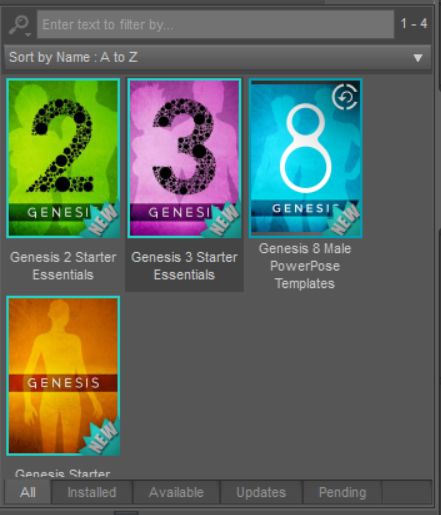
Step 3: Select the preferred “Genesis” product package. Each Genesis product package includes individual items to assist you in creating your character. Certain items may also be backward compatible with other Genesis product packages.
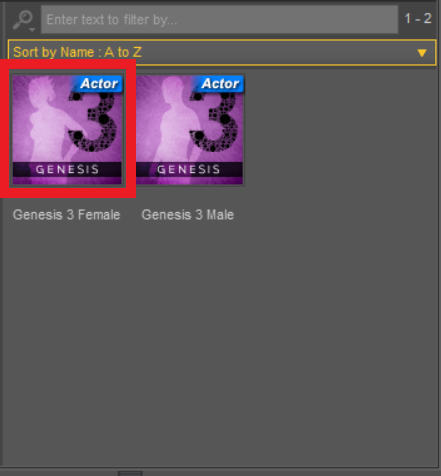
Step 4: After selecting the preferred Genesis, you will be sent to its folder. Select “Figures” from the drop down menu under “All Files.” And select whether you want a Male or Female character.

Step 5: Double click on your selection and your character should appear at the center of the "Viewport."
Clothing on the Character:
Step 1: Select the “Scene” tab in the upper right hand corner and highlight the character.

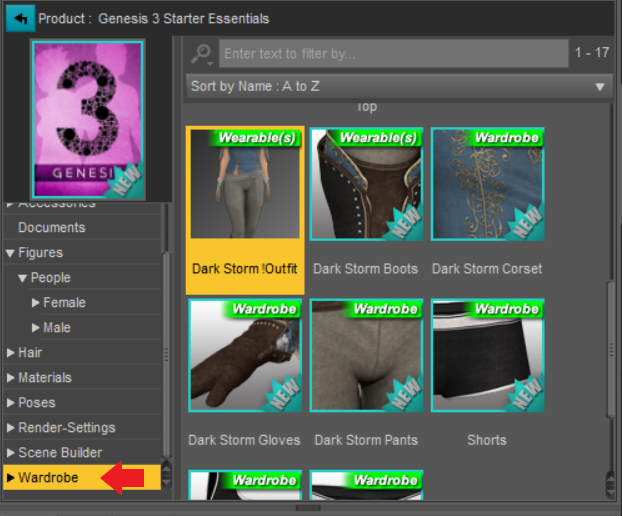
Step 2: Within the “Smart Content” tab, select “Wardrobe” from the menu list. From here double-click on your preferred wardrobe item to load onto the character.
Step 3: To view all of the materials on the character's clothing, select “Viewport Render Settings,” located at the top of the viewport and select “Texture Shaded.”

Hair on the Character:
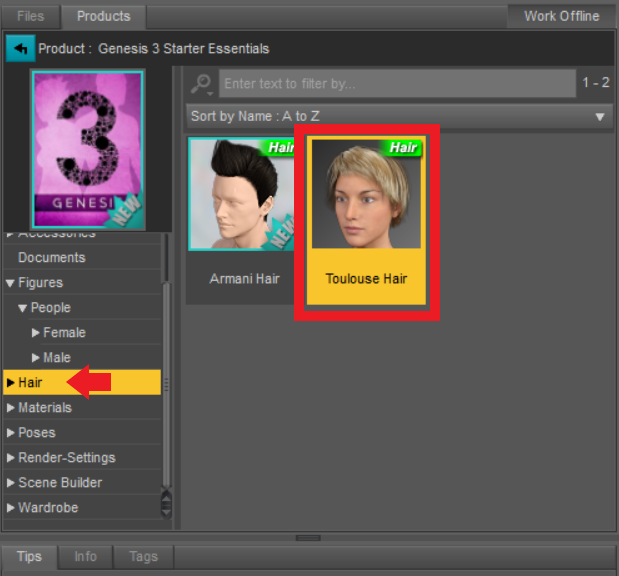
Step 1: Within the “Smart Content” tab, select “Hair” from the menu list. From here double-click on your preferred hair style item to load onto the character.
**Additional Details:
To learn more about how to bring in an environment and pose the character, refer to the article, “How to Place an Environment and Pose your Character within Daz Studio?”